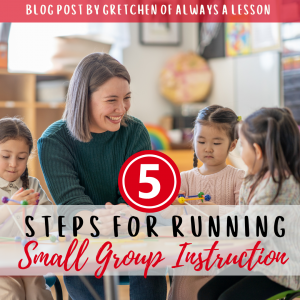
5 Steps for Running Small Group Instruction
Small group instruction is a powerful way to provide intervention to struggling students. Intervention is a technique teachers use to interrupt the flow of instruction to lend aid to confused students. There are various reasons why a student could have a poor understanding. They could have gaps in their learning, instruction moved too quickly to grasp, the concept is dense and requires more practice, etc. When grouping is flexible and ever-changing students feel excited to participate because they are not labeled as always struggling or needing help. But due to this flexibility, small group instruction can be difficult for teachers to do effectively.
 This post will outline 5 steps teachers can implement consistent to run effective small group instruction in their classrooms.
Step 1: Determine your Data Source
Before you begin to pull a small group, you have to decide which piece of data you will be using to formulate groups. Common data sources are formative assessments (formal and graded tests) or informal assessments (student observations, classwork, homework, etc.). Think about which assessment is the most recent reflection of current student learning and use that one. If you use an older assessment, you might group students who no longer need the attention.
Step 2: Make your Flexible Student Groups
Review the data and highlight low performers. Then group together students struggling with the same skill. For example, if a few students all missed question #4 that dealt with two-step word problems, create a group tackling that skill with only the students needing help in that area. Depending on how long your instructional block is will determine how many small groups you can pull. Usually small groups last 15-20 minutes with an -re-introduction to the skill, guided practice together, and independent practice with feedback. Plan out your skill groups for the week.
You may have students attend multiple skill groups a week because they require additional time and attention to master skills. If you notice this, add an additional layer of support during whole group instruction. Otherwise, these groups are meant to be flexible and the students visiting should change based on the skill being covered.
Step 3: Plan Skill Based Mini Lessons
Now that you know what skill you are focusing on and which students need to attend the small group, its time to plan the mini lesson.
- Select your instructional materials
- Write your objective
- Draft or choose an example
- Practice how you will demonstrate the skill
- Draft or choose 2-3 guided practice activities to complete together
- Draft or choose 1-2 independent practice activities for students to do on their own
- Allot time for reviewing student work, providing feedback, and allowing them to make the appropriate changes
Once a student has demonstrated mastery of the skill (ie. they can complete the independent activities with accuracy), they are excused back with the rest of the class to complete whatever assignment everyone else is working on. If after instruction and feedback, students continue to struggle, make note and send them off to the whole class activity after the 20 minute mark. You will likely have to pull those students again another day for that same skill, but do not extend your small group lesson in the moment as it throws off the pace and plan of instruction for the rest of the lesson.
Step 4: Deliver Targeted Instruction
Be sure to teach a skill in isolation. If you add in too many skills or erroneous details, it could add to the confusion that the student is experiencing. In Reading, if you are using a text to practice be sure to focus your teaching on the skill instead of on the storyline of the text. In Math, if you are working on two-step word problems and there is a secondary skill available to teach (ie. cross out irrelevant information or using multiple strategies to check work), do not address it at this time. You can use the same word problem again in a future skill group when teaching a different skill, but keep each group to one skill at a time.
Step 5: Collect & Review Fresh Data
After you have completed the planned small groups for the selected skills, its time to repeat the cycle with new fresh data. Fresh data means the student performance information you are going to use is the most recent data you have access to. As a reminder, if you wait weeks before pulling groups based on a data report, the students may have mastered skills by this time and therefore it is considered “dead data.” Continue to collect recent data and teach small skill groups throughout the year.
This 5 step small group instruction protocol will help ensure every teacher provides high quality differentiated support to students on an ongoing basis. This will lead to an increase in teacher proficiency (skill level) and student achievement (grades, scores, etc.). The domino effect of transforming this one sliver of instruction has tremendous impact on everyone involved.
Practice the steps and if you find yourself needing feedback, reach out for help to instructional leaders (ie. facilitators, coaches, administration, etc.).
Additional Resources:
Want more support? Browse our full collection of printable and digital tools. You can also read more helpful posts on the blog—and don’t miss my latest book: Always A Lesson: Teacher Essentials for Classroom and Career Success.
GO BE GREAT!

